
|
|
Federal Firearms License (FFL) holders are required by law to perform a background check on individuals who want to purchase a firearm but who do not hold the proper permit. The background check is performed through the National Instant Criminal Background Check System (NICS) program and can be done over the phone or online. Once a background check has been performed, the FFL receives a NICS transaction number used for referencing the check as well as validation of the check.
System Five e-Bound Book makes it easy for you to capture the NICS (or FFL) number for firearm transactions within your bound book, allowing you to:
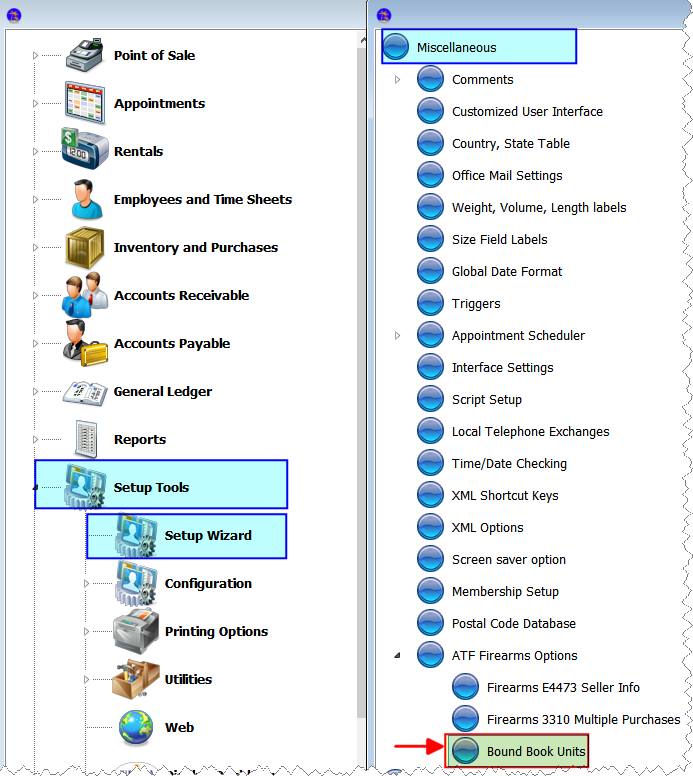
Figure 1. Setup Wizard Window
Tip: For quicker access to Bound Book units, type the word Bound in the search box of the Setup Wizard and click [Go] (Figure 2).
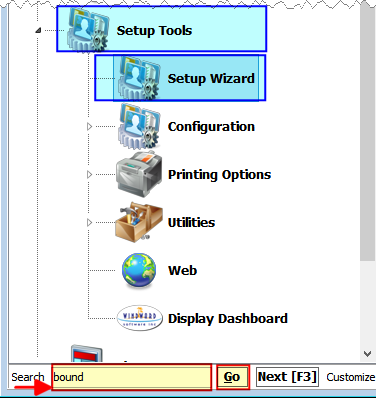
Figure 2. Quick Title Search in The Setup Wizard

Figure 3. Enabling Settings for NICS# or FFL# Requirement
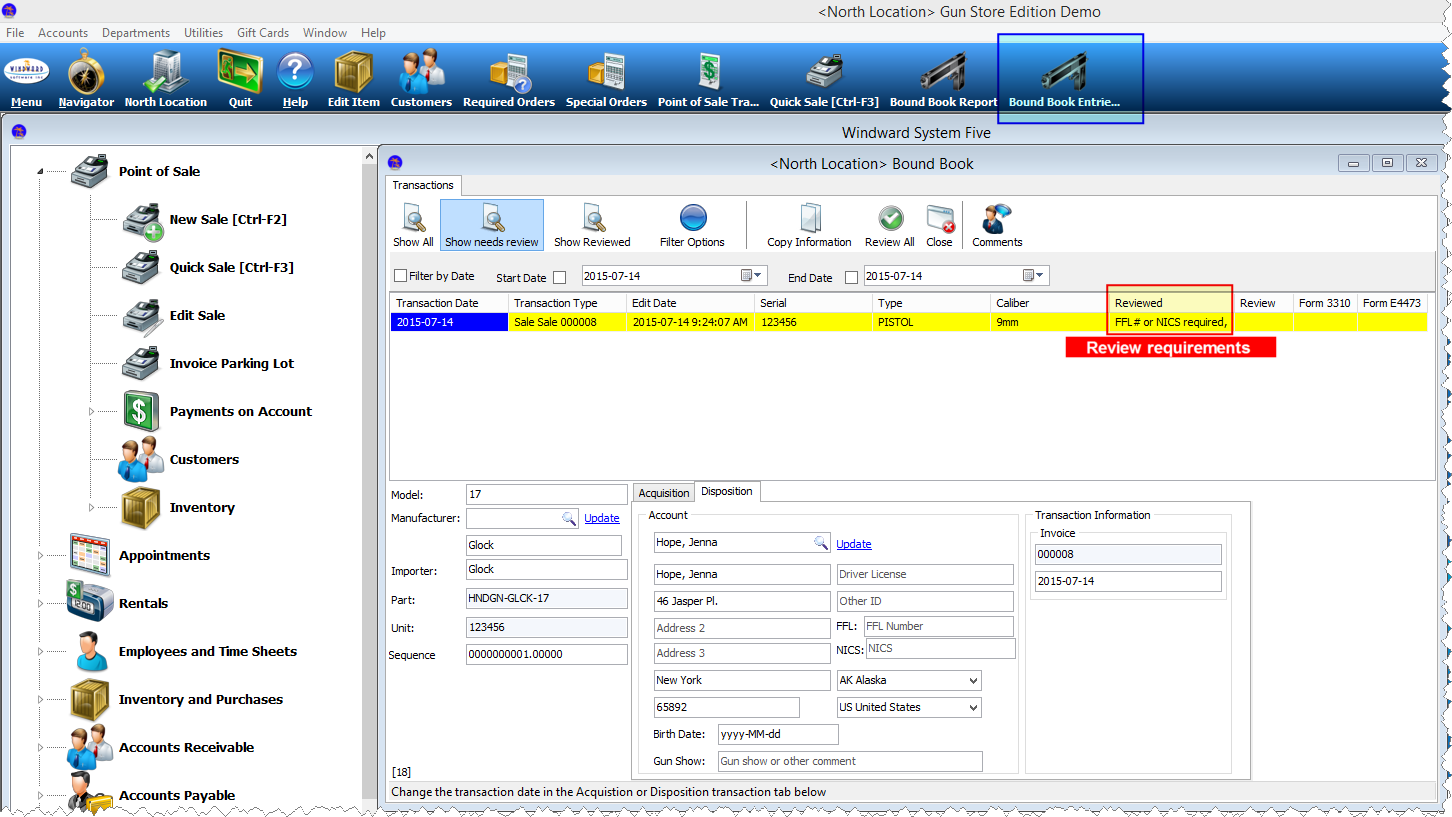
Figure 4. Viewing Bound Book Entries Needing Review
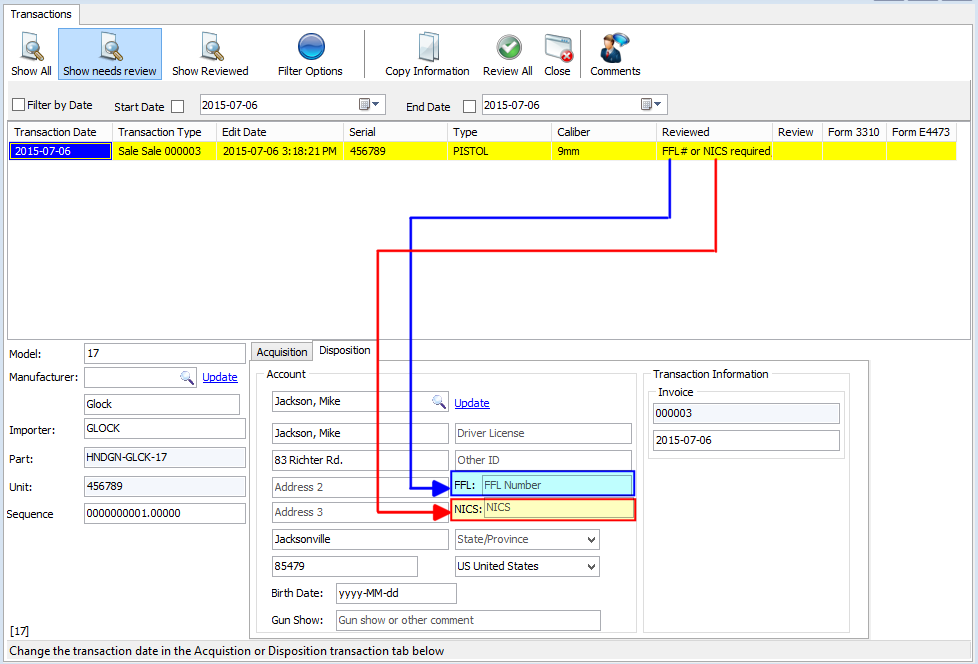
Figure 5. NICS# and FFL# Fields
 in the Reviewed column (Figure 6) will signal that the entry is ready for commitment to the bound book.
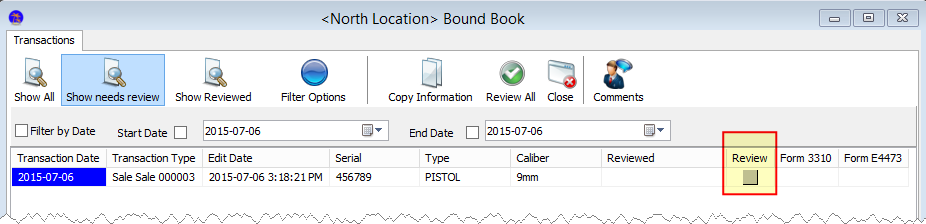
Figure 6. Entry Ready for Commitment
A confirmation message will pop up (Figure 7), asking you whether you want to commit the entry to the bound book. To commit the entry, click [Yes]; to continue the review and/or defer the commitment, click [No].
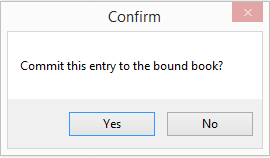
Figure 7. Pop-up Message for Confirming Commitment of Entries
Once the entry has been committed, a transaction number and date will be assigned to it in the Reviewed column (Figure 8).

Figure 8. Transaction Number and Date Assigned to Bound Book Entry
You can track NICS numbers on either the Audit Trail Report or the FADR report.
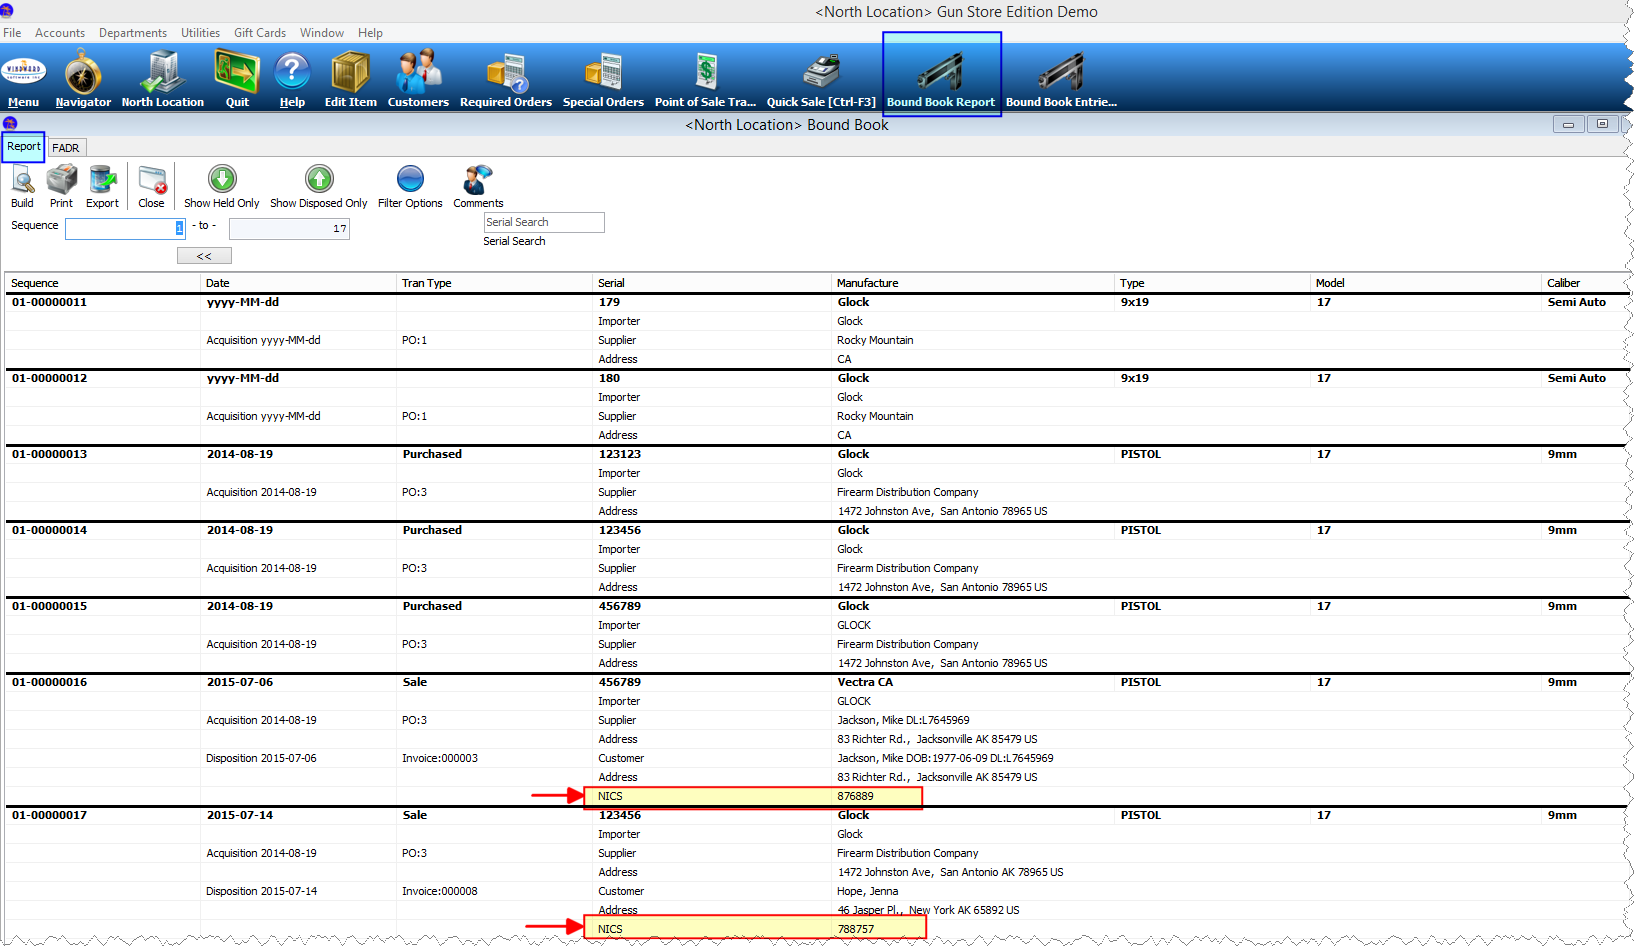
Figure 9. Tracking NICS Numbers on Bound Book Report
Note: If you did not enter comments at the time of the review, you can still insert comments by clicking the [Comments] button  on the report ribbon. It is recommended that you provide a reason for modifying the original entry in the form of a comment for easy report management. If you enter a comment, click [Build] to re-generate the report.

Figure 10. Tracking NICS Numbers on The FADR
Tip: For either the Audit Trail report or the FADR report, you can choose to filter the entries by including or excluding NICS and/or FFL numbers (Figure 11).
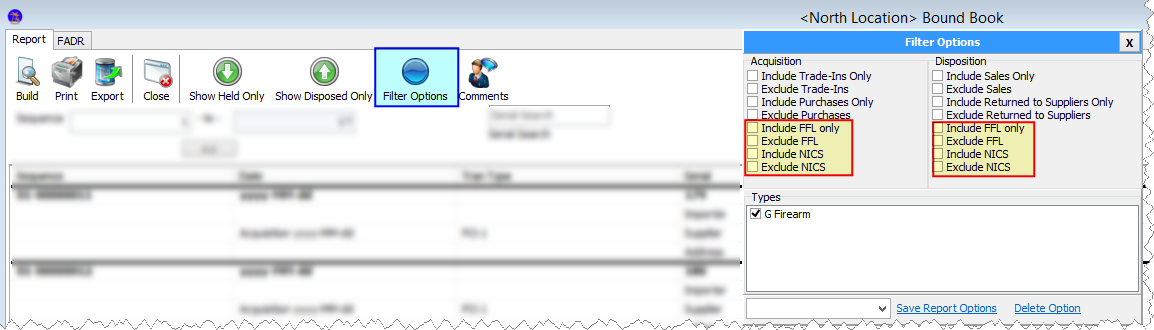
Figure 11. Enabling Filter Options for NICS and FFL Numbers
See also: Editing Bound Book Reports
See also: Bound Book Entries Needing Review
< Return to: FFL Bound Book Reporting