
|
|
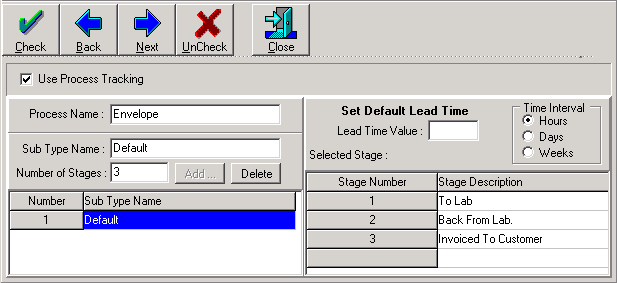
Process Tracking is an optional module originally designed to help photo finishing shops track the envelopes
containing customer's film from the time it was dropped off, through the development of the film and finally when the prints were delivered to the customer. This feature could be used to track virtually any process that contains a series of steps or stages.
The following tasks are required to set up and configure the Process Tracking module.
Note: The Process Name has a Maximum of 20 Characters.
By default, System Five creates a sub-type and three stages. These defaults are all that is required in order to start using this feature,
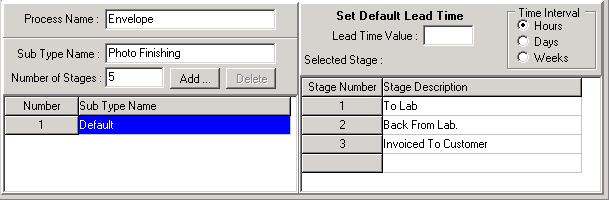
The 'Sub Type Name' box displays the Name of the Sub Type selected in the list.
The 'Number of Stages' box displays the maximum number of Stages associated with the selected Sub Type.
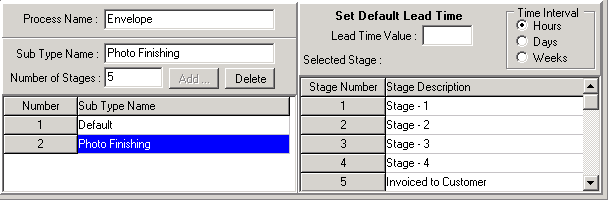
 System Five creates a new 'Sub Type' and the associated 'Stages' that you have specified.
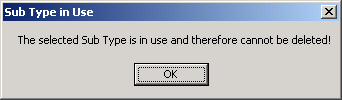
Select the Sub Type you wish to delete from the list.
Click the 'Delete' button.
System Five performs a test to ensure that the selected Sub Type is not in use. If the Sub Type is in use you will receive a message informing you that the Sub Type cannot be deleted.
If the Sub Type is not in use System Five will remove the Sub Type and the associated Stages.
If the need arises to add an additional stage to an existing Sub Type you can do this by typing the new Stage Name into the last row of the Stages list.
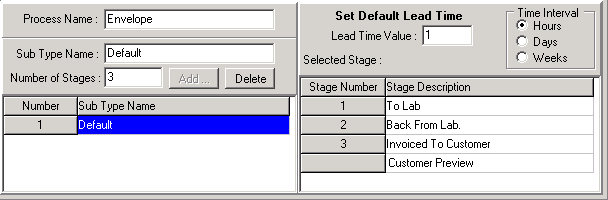
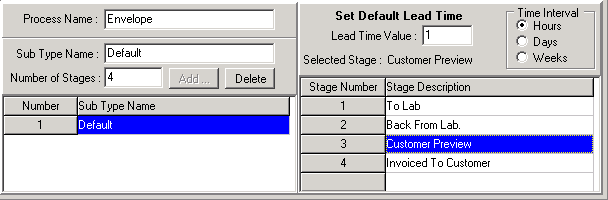
When you have finished typing the name simply press the [Enter] key and System Five will add the new Stage and update the list of stages to ensure that the last stage is always named 'Invoiced To Customer'.
To remove an unwanted Stage from an existing Sub Type click in the Stage that you want to Remove and press the [Ctrl + Delete] keys on the keyboard.
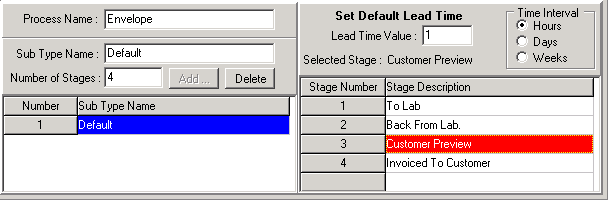
System Five will remove the selected Stage and update the list of stages to ensure that the last stage is always named 'Invoiced To Customer'.

Each of the Stages within a process can have a different Lead Time and Time Interval. They can also have the same Lead Time and Time Interval. These values are used to assist the user when entering information. They do not control any automatic process. These values are used to calculate the Due Date and Due Time values for each of the stages.
The Lead Time is the number of Time Intervals required for the specific stage.
The Time Interval is the measure of time, Hour, Day or Week that the Lead Time refers to.
Example A Lead Time value of 1 and a Time Interval of Hour indicates that the Stage takes 1 hour to complete.
Modifying the Lead Time or Time Interval will change the default value for the Stage that is currently selected in the Stages list. These values will used to assist the clerks as they move items from one stage to the next or back again. They do not control any automatic procedures.
Note: It is always recommended that you close System Five after making changes to the Setup. Re-opening the software ensures that the new settings take full effect.
< Return to: Process Tracking overview