
 |
|
See Also: POS Transaction Report Overview
With both Deposit Wizard options: Use the Automatic Bank Deposit Wizard and Skip the Cash Count tab and go directly to the Deposit Worksheet checked, the flow of the POS Transaction report changes to the following:
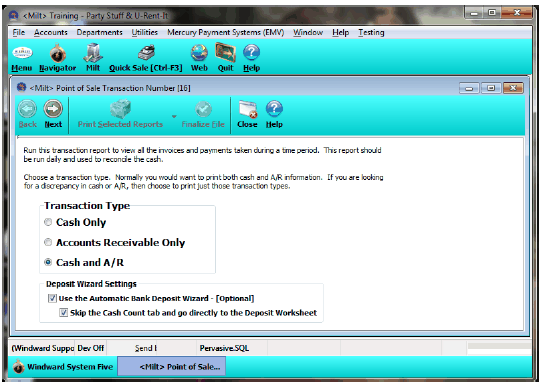
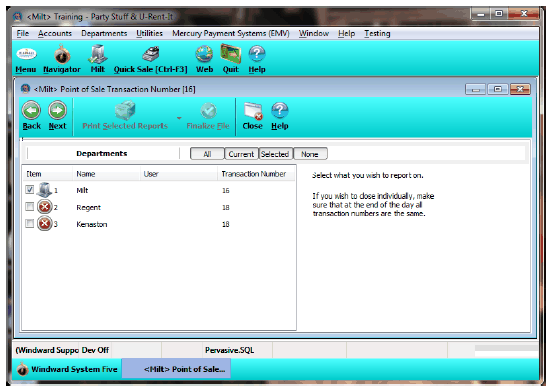
In this mode, the current department is selected by default and selecting any additional departments will be ignored by the report. Only the current Departments transactions will be loaded in the report even if you select some or all of the other departments. This constraint is required in order for the Deposit Wizard to create the required accumulated Ledger Lines for the various Tender Types that are grouped in the resulting Ledger Entry.
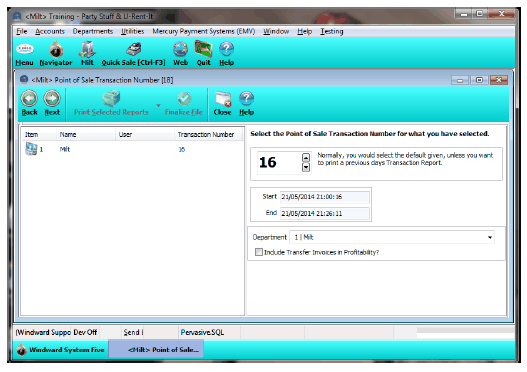
In this screen you can accept the default number or select a previous POS Transaction report to view.
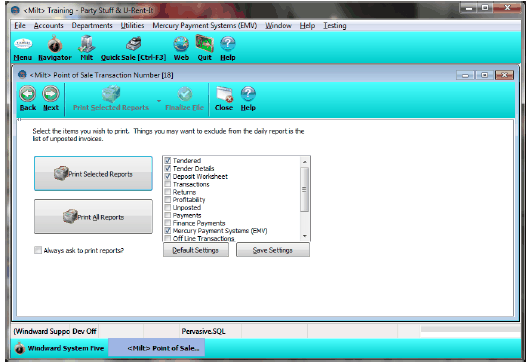
This step is basically un-changed when the Deposit Wizard feature is enabled. The same selection of the desired reports is available regardless of the Deposit Wizard feature.
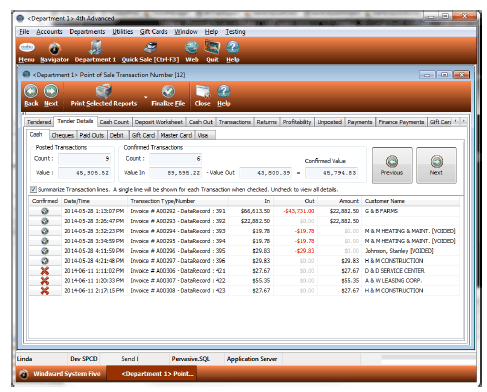
The screen loads all of the transactions for the selected Transaction File Number and Department. By default the system displays the information in a Summary format, a single line for each transaction. You can un-check the Summarize Transaction Lines check box to see the detailed information, as shown below.
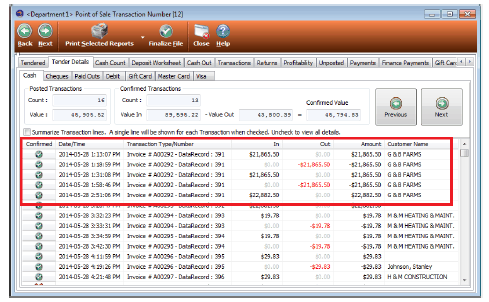
In the Detail Mode, Invoice # A00292 shows 5 lines where in Summary mode it only shows a single line. This information shows that a Payment was applied, deleted, re-applied and deleted a second time and then finally a payment was applied for a different amount. This is basically an audit of the activity for the Cash Tender Type on this invoice.
You will also notice that the top of the tab shows values for Count and Value for both the Posted Transactions and the Confirmed Transactions with the value in and out and a combined total. As you check the Confirmed column for each of the listed items, these values dynamically update to provide you with feedback.
All of the Transactions can be confirmed by Left-Clicking the column header on the Confirmed column of the listing.
Clicking it a second time will un-check all of the listed transactions.
This same functionality is provided for each of the Tender Types configured in the system. In this example, there are tabs for Cheques, Paid Outs, Debit, Gift Card, Master Card and Visa. They all behave the same way and provide the same tools for the user's convenience.
There are Next and Previous buttons provide for easy navigation through the Tender Types.
You can also go directly to any Tender Type by clicking on the desired tab.
Once all of the Tender Type Details have been verified, the system moves on to the Deposit Worksheet tab as shown below.
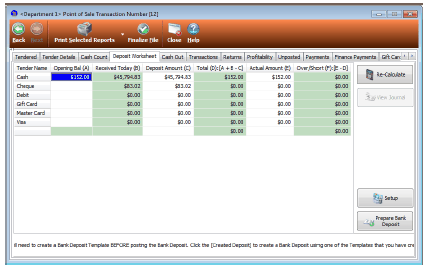
On this tab, there are columns for the Opening Balance, Received Today, Deposit Amount, Total, Actual Amount, and Over/Short
The Opening Balance column will be filled in with the Actual Amount from the Previous days cash out.
If this is the first time the feature is used, the Opening Balance column will have a white background and you can enter the Actual Amounts starting balance. Once the opening balance is entered, the system keeps track and you will no longer need to enter this value.
The Received Today, Deposit Amount and Total amounts are auto-populated based on the Tender Detail information. You can change the values in the Deposit Amount column, which will update the Total and Over/Short columns automatically.
To balance the Over/Short, input a value in the Actual Amount column to indicate the correct value.
Any value in the Over/Short column will be posted to the Ledger so it can be tracked over time.
When the system is configured to use either of these close methods, the system doesn't offer the second option on the first screen of the POS Transaction Report.
You can still select the Deposit Wizard, however the ability to Skip the Cash Count tab is not offered in these modes, as shown in the picture below.
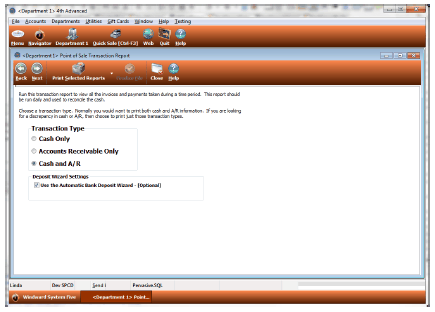
The ability to select multiple departments or a department other than the current department is not yet available.
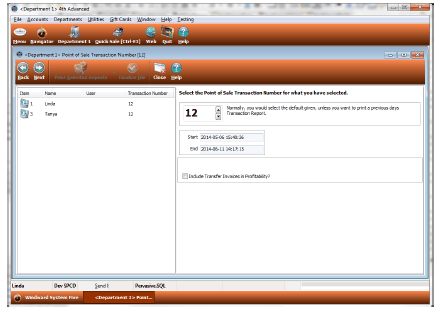
All of the other tabs are basically the same in the close by methods. The next change is the new Float Detail option on the Cash Count tab.
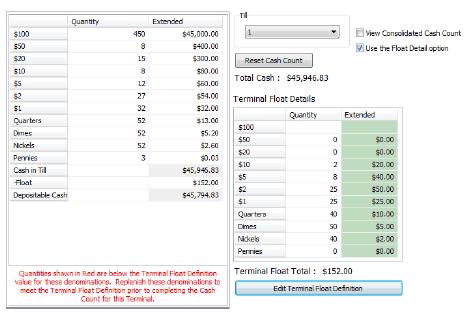
When the option is checked, the system displays a new grid that you can enter a Standard Float for the current Terminal.
To enter the float definition, click the [Edit Terminal Float Definition] button.
Types in the quantity for each of the cash denominations and the system then auto-extends the quantity to a monetary value.
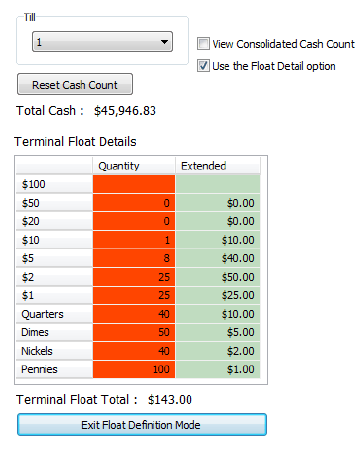
While in the [Edit Terminal Definition Mode], the Quantity column changes color for easy detection of the mode. Once they have completed the entry of the definition, they need to click the [Exit Float Definition Mode] button to save the Terminal's Float Definition.
Once the Float is defined, the system will help ensure that there is enough of each of the definition denominations in the cash count to cover the defined float.
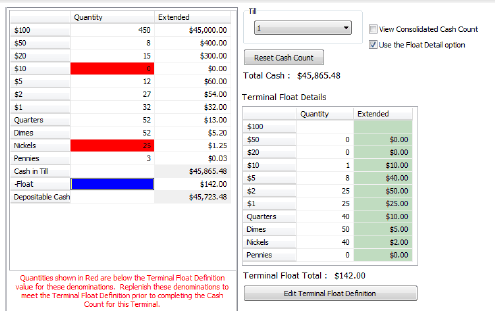
In the example above, the $10 and Nickels denominations do not have sufficient quantity to cover the float definition and the system has colored the cells in Red (see explanation on screen about the cell color).
The minimum quantity for each denomination of currency that is required to meet the float definition is shown on the right side of the window. The onscreen information is to simply assist clerks. Typically the cash drawer is counted back to the float value and the remainder is deposited to the bank. These features are included to help you with this process.
Note that these are Terminal Settings, so they can be different for each terminal and the settings for one terminal are not related to any other.
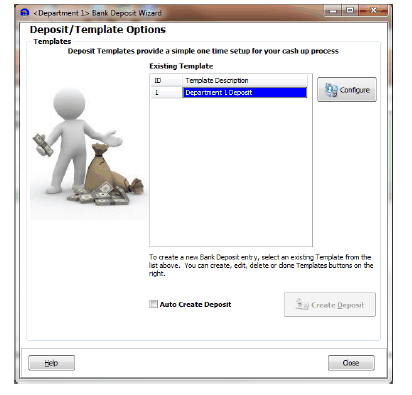
In order for the system to create the required Ledger Entry, it needs to know specific information. The Configuration of the Deposits is required before the wizard can perform the designed function.
Clicking the [Setup] button in the lower right corner of the Deposit Worksheet tab opens the Deposit/Template Options screen shown above.
To Create, Edit or Delete deposit templates, click the [Configure] button.
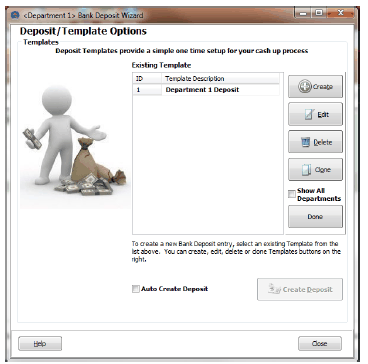
The screen will change and list the buttons shown above.
To create a new Deposit Template, click [Create] and provide the information requested in the next step.
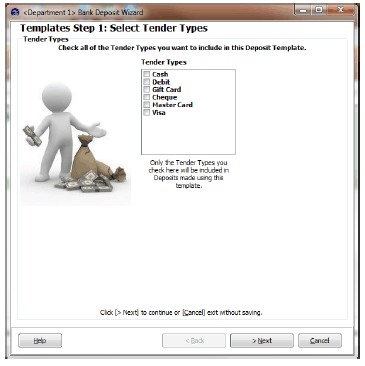
Select the Tender Type(s) to include in the new Deposit Template.
This allows you to create different templates for Cash and Checks than the ones used for Credit/Debit cards, and these deposits are quite often done at different times, on a different schedule and likely to different banks accounts.
You can select all of the Tender Types and only have one template if that method works for you.
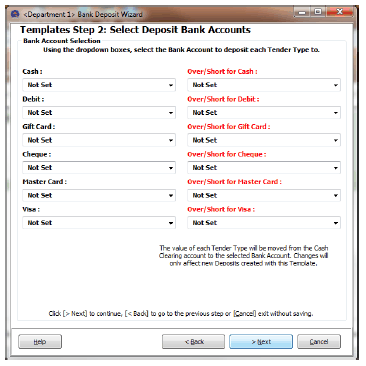
Once the Tender Types are selected, the next step is to set the Ledger Account to use for each of the Tender types that are being deposited.
Select the Bank Account and the Over/Short account for each Tender Type. The accounts can be all the same or different for each tender type based on the unique needs of your business.
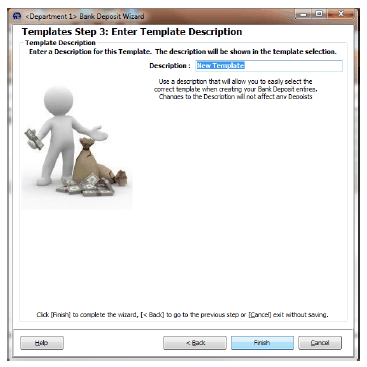
Finally, enter a name for the Template, and click [Finish] to save the new template.
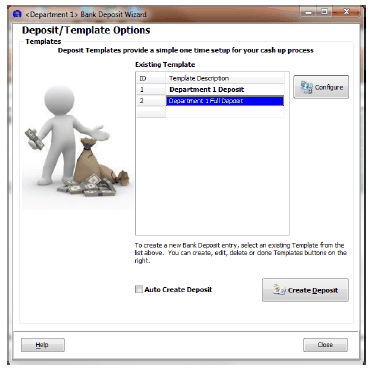
Now that there is a Template to select, the user can perform the Deposit.
In the list of Templates, select the desired Deposit Template and click [Create Deposit] or use the Keyboard Shortcut (Alt-D)
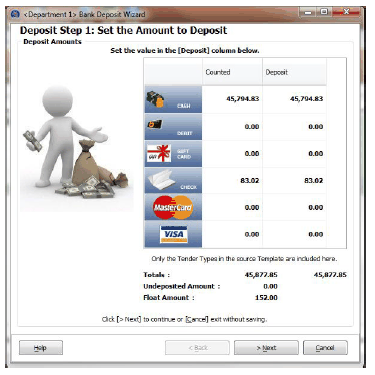
The system now displays the information from the Deposit Worksheet for final review.
Review the values and confirm.
You can make adjustments and those are used to update the Deposit Work sheet.
Changing the Counted column values will change the amount of each Tender Type that is deposited and those changes will be reflected in the Deposit Worksheet so that the Ledger Entry and the Deposit Worksheet remain in sync. 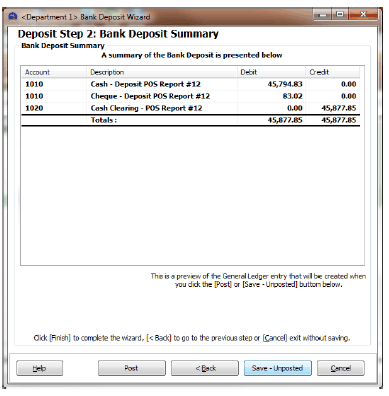
The system then displays a preview of the Ledger Entry that will be created. You can then Post the Ledger Entry, Save the Ledger Entry in an Un-posted state or Cancel.
The ability to Post to the Ledger is required in order to Post the entry. Users that do not have sufficient security permissions can only Save the entry in an un-posted state.
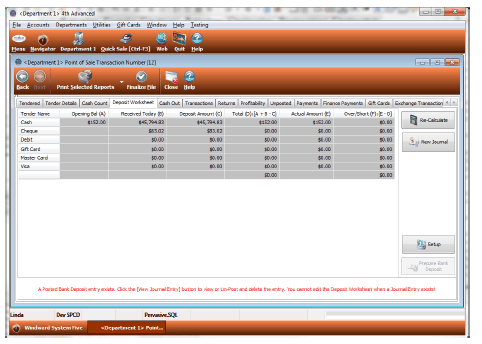
Once the Deposit is saved or posted, the Deposit Worksheet is now Read Only. The information can be changed by editing the Ledger Entry or by Un-Posting and Deleting the Ledger Entry which would require that entire deposit to be re-processed.
The Ledger Entry can be viewed, based on permissions. The system also adds information to the bottom of the tab to inform that there is an existing Ledger Entry for this Deposit Worksheet and explains that it cannot be edited while that ledger entry is present.
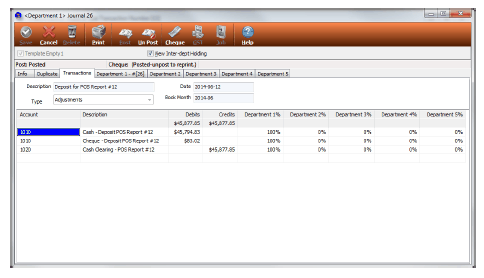
The Ledger entry includes information about the Tender Type, Transaction File Number and dates
Version 1.0 of this feature doesn't support multiple department deposits. We MAY look at adding that to a future version, but it is not guaranteed.
< Return to: Point of Sale Transaction Report Main