How to Create Invoices
Creating an invoice is done from the Point of Sale menu option. To create an invoice complete the following steps:
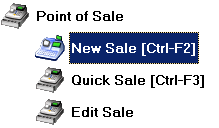
- Select the following menu path: Point of Sale > New Sale (or press Ctrl-F2 for the keyboard shortcut)
- The New Invoice dialog box appears similar to the figure below:
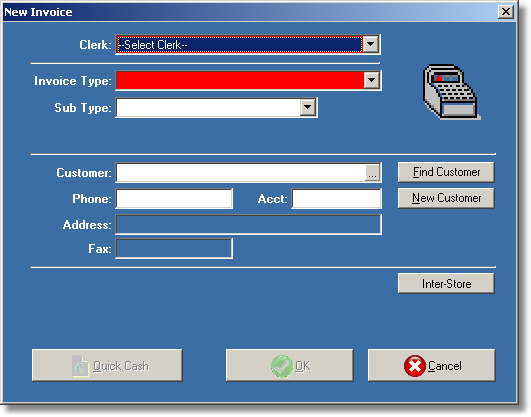
- In the Clerk: field enter a clerk number, or user name, or use the drop-down menu to select a user.
- In the Invoice Type: field enter the invoice type by selecting it from the drop-down list or by typing the letter corresponding to the invoice type i.e. C (Cash Sale), A (Accounts Receivable), W (Work Order), etc. The system can be set up to have a default type appear automatically.
Note: If this is a simple cash sale and you do not want to record the customer name with the sale details click [Quick Cash] on the lower left area of the New Invoice dialog box to open the Quick Cash input screen:

- Identify the customer with any of the following methods:
- enter the last 4 digits of the customer's telephone number or
- click [Find Customer] to search for the customer record if they are in the customer database or
- type the last name or business name in the Customer: box or
- add a new customer by clicking [New Customer] to open a blank record and enter the pertinent information.
- Click [OK]to continue:

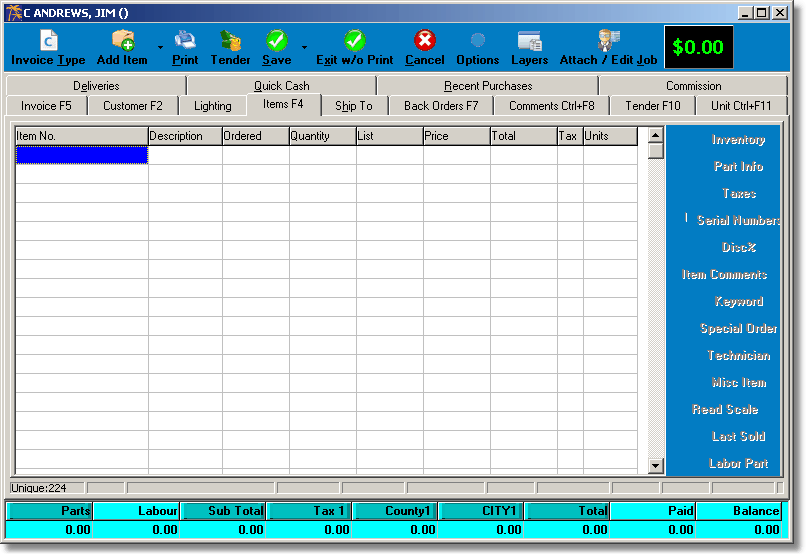
- The Items page of the invoice appears similar to the figure below:
- Add the items the customer is purchasing to the invoice with any of the following methods:
- type the part number of the item in the Item Number column of the invoice
- type the first word of the description in the Description column of the invoice
- scan the barcode of the item with a barcode scanner (if you are using barcodes)
- click [Add Item] on the toolbar of the invoice:

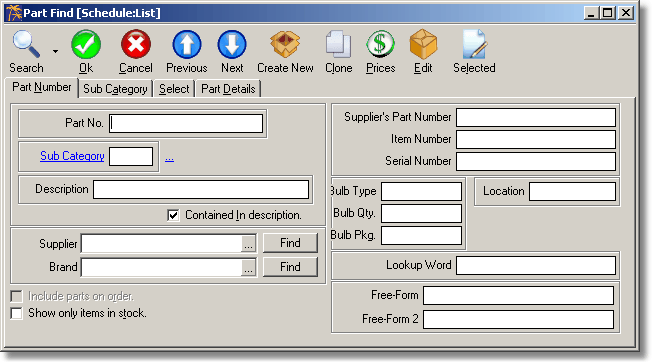
- If you click [Add Item] the Part Find dialog box shown below appears. Use any of the search fields to find the items being purchased.
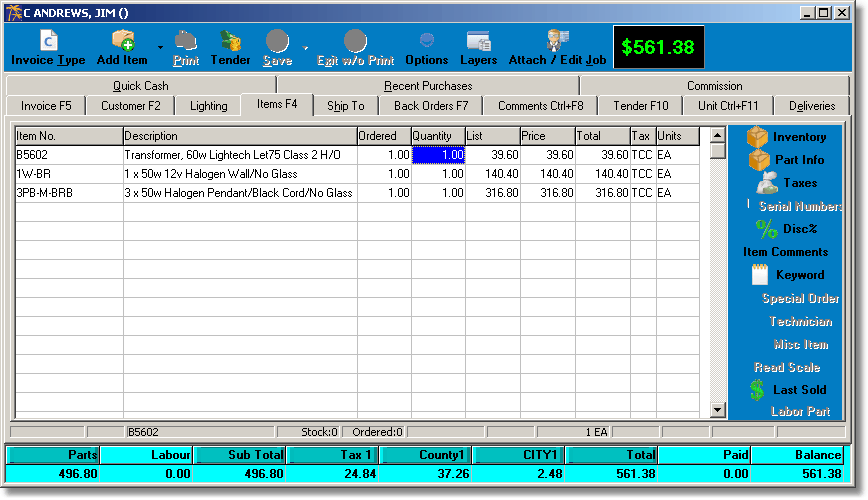
- Once selected the items are added to the Items page of the invoice as shown in the example below:
- When all the items have been added to the invoice it can be tendered by any of the following methods:
- Press the Esc key on the keyboard
- Press F10 on the keyboard
- Click [Tender]:

- The Tender page appears. The figure below shows the local currency as well as a foreign currency which was set up in the Setup Wizard:

- Select the tender type and then:
- press Esc to automatically fill in the amount
- or double-click the tender field to automatically fill in the amount
- or type in the amount and press Enter
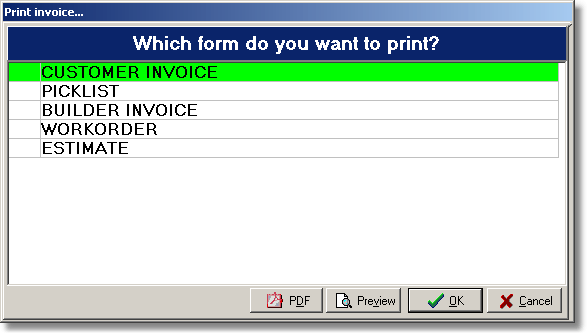
- Press Esc or click [Save] to print the invoice. The appropriate receipt or invoice form can print automatically, or a selection of choices can be presented similar to the example shown below: